Tune an Image Analysis
An image analysis opens on one image with its pipeline in the sidebar. Tune the steps on that one image until the detection lands where you meant, then run the same settings across the set.
The sidebar keeps the same layout throughout, with Analysis run at the top for the runs you have made and Pipeline under it for the steps and the controls that run them.
Opening a Step
Open any step in the sidebar to see one line on how it works, then its settings. How it works under that line opens the full account, and the info button beside a setting's name explains that setting.
Changing one re-runs the pipeline live on the image in front of you. The settings are named for what they do: whether to measure bright or dark areas, an automatic or fixed threshold, a minimum object size, or whether to clean up background.
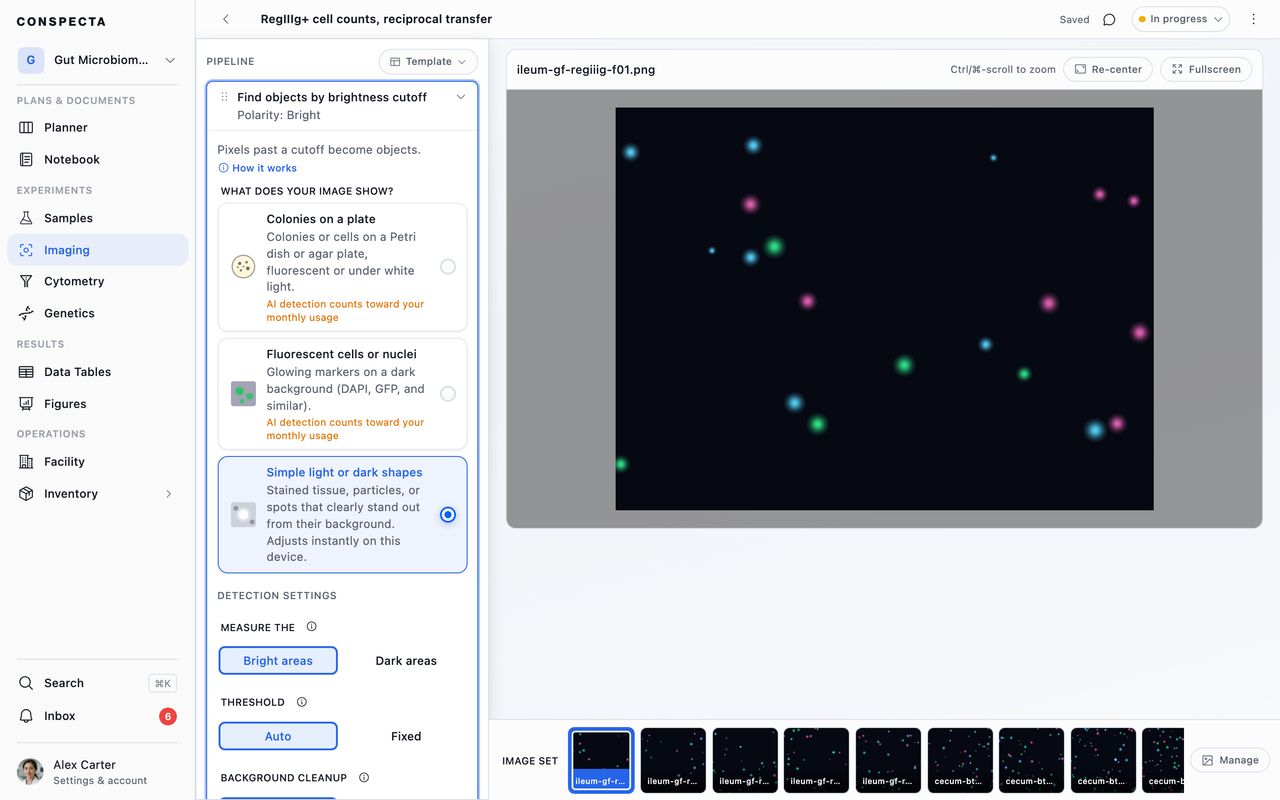
An open step lists every setting it has, the everyday ones first and the finer ones after them, such as how an automatic threshold is chosen, how hard to split touching objects, how far a blur or a cleanup reaches, and what a gate keeps objects on, shape included.
Some steps carry a setting that no other step has:
| A step that | Its own setting |
|---|---|
| Cleans up object shapes | Remove objects touching the edge, which drops the objects the image edge cut off, so their clipped size and shape stay out of the results |
| Measures covered area | Threshold strategy, with every choice detection by brightness offers apart from Adaptive, because coverage records one cutoff for each image |
| Matches objects to the regions holding them | Match by. Center inside the region matches each object to the region its center falls in, and Most of the object inside matches it to the region holding the largest share of it, once that share reaches Smallest share inside |
| Scores overlap between two markers | Overlap thresholds. Automatic (Costes) picks the cutoffs for Manders' coefficients from each image, and Fixed cutoffs uses the Marker A cutoff and Marker B cutoff you set, so the same cutoffs hold across a set |
Remove step at the foot of a step asks you to confirm, then takes it out. When another step reads it, the step stays and names that step instead.
Add step under the last step offers the steps that can follow the whole pipeline and adds the one you pick at the end, open so you can set it. When a step could read more than one thing, such as the whole image or the objects found, the image before or after a cleanup, or one of the image's channels, the choice sits at the top of its settings. Image analysis pipeline steps lists every step the menu can offer, what each one reads, the settings it opens with, and why the menu is shorter on some pipelines.
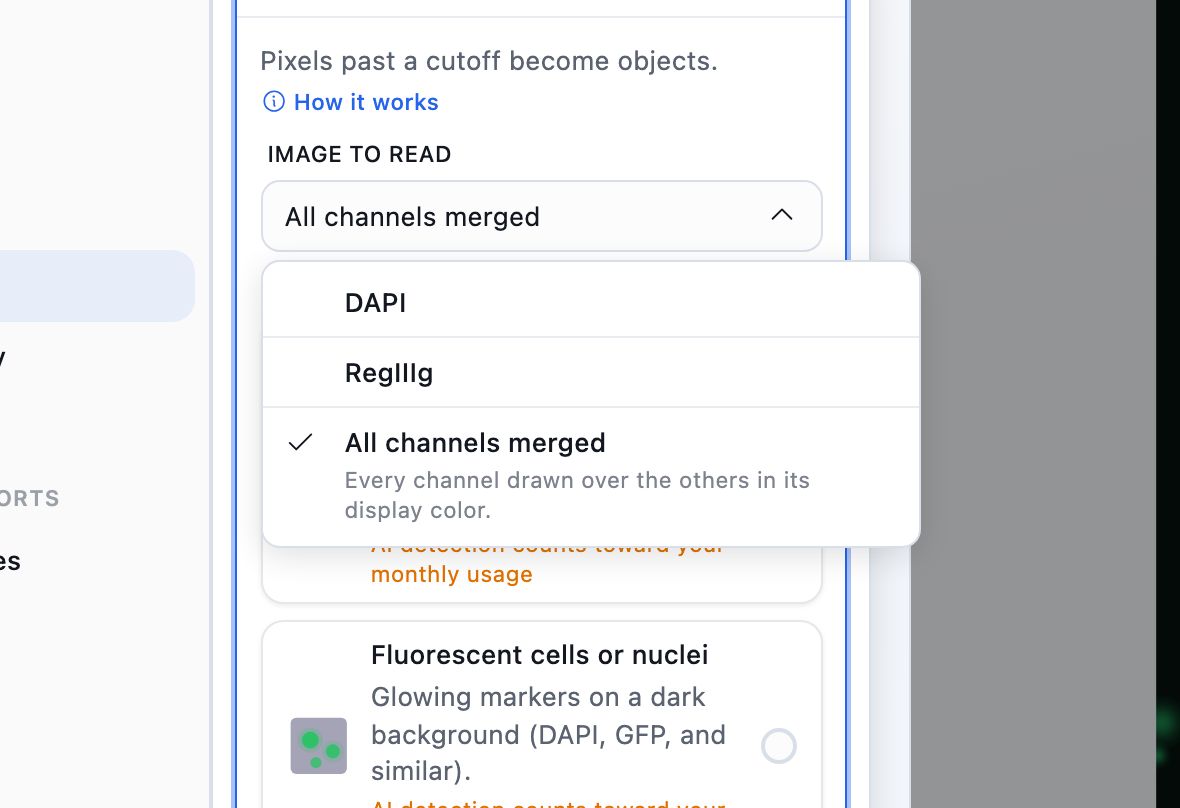
On a multi-channel image that choice lists the channels by the names the microscope recorded, such as DAPI and GFP, and a channel the file left unnamed reads as its position. The list ends with All channels merged, which reads every channel drawn over the others in its display color, so point a step at a single channel when you mean one marker's pixels. On a z-stack each entry says it measures the plane the viewer is on, so set Depth to the plane you mean to measure before you run the set. Each step's line in the sidebar names the image it reads, so a pipeline that detects in one channel and measures another says which is which on both steps, a step reading the merged view says so, and a finished run still says it.
Detecting with an AI Model
A detection step set to Colonies on a plate or Fluorescent cells or nuclei shows two settings of its own below that question, both starting at Standard.
| Setting | What it changes |
|---|---|
| Detection sensitivity | How much of the image comes back as objects. More objects picks up dim nuclei that Standard leaves out, and some background with them. Fewer objects keeps only the confident ones |
| Overlap between objects | What happens where two objects touch. Merge less keeps them apart, which suits a dense field of nuclei, and Merge more counts them as one, which suits colonies that have grown into each other |
Both stay with the step when you switch between those two choices, and Simple light or dark shapes has its own cutoff instead.
Changing either one and pressing Run detects the image again, which counts toward your team's monthly usage. An image already detected at the settings you are on is reused, so running it again adds nothing to that. Where the question is about size, confidence, or brightness, Filter under the image works on the objects a run already found and uses nothing.
Rearranging the Pipeline
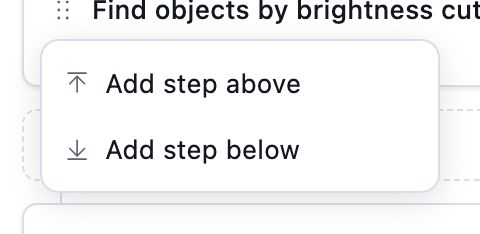
To put a step somewhere else, click the grip at the start of the step it goes beside. Add step above and Add step below offer only the steps that fit at that place.
A cleanup added above detection becomes the image detection reads, and detection shows a line such as "Now reads Smooth away noise" for a few seconds. A step that measures brightness keeps reading the image as it was acquired, and you can point it at a cleaned image from its settings.
Move up and Move down in the same menu move a step one place, and dragging the grip moves it further. Two cleanups trade places along with what each one reads, and an object cleanup moved above a measure becomes the objects that measure reads.
A step always stays below the steps it reads, so the menu offers only the moves a step can make, and a cleanup that detection reads has no Move down. While you drag, the steps it can't pass fade.
Settings Left on Auto
A setting left on Auto is worked out again for every image, so its step shows the value it came to on the image in front of you, such as "Auto (Otsu), resolved to 118 on this image". A step that cleans up background shows "Background offset resolved to 30 on this image". Move to another image in the set to read its value there.
Expect threshold between, among that step's settings, records where you expect the value to land across a set, such as 90 to 160. An image that lands outside the range is named in Checks with the value it reached, and the run keeps that value, so the range points you at the image worth opening and leaves the measurements as they were made. A background cleanup step carries the same setting for its offset.
Try a Range
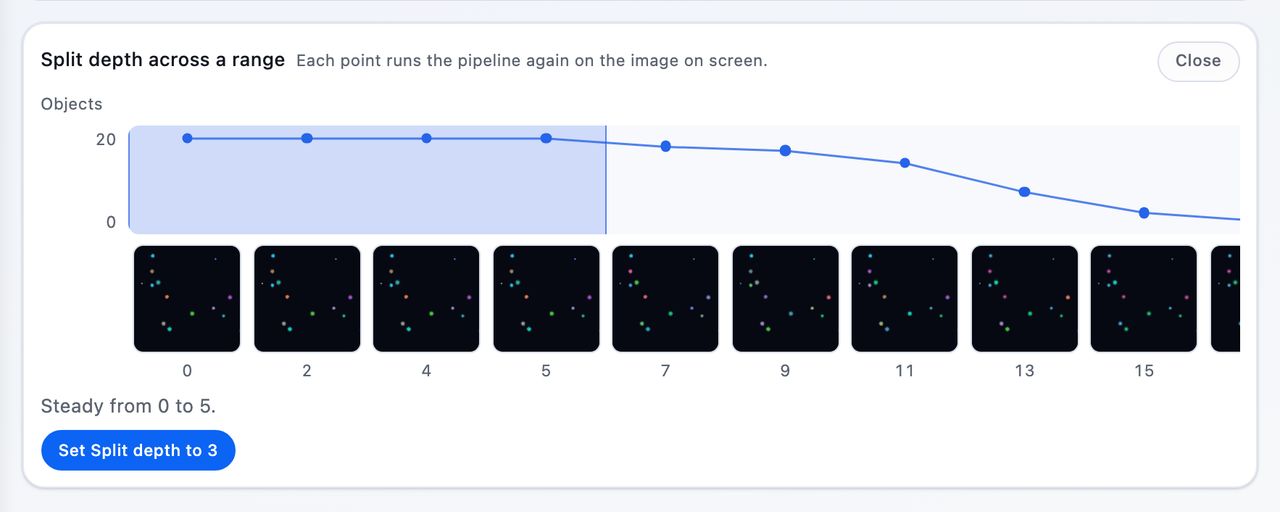
Try a range, beside a setting in the sidebar and beside the cutoff under the image, opens a panel under the image and tries a dozen values across that setting's range, drawing what each one measured: the objects it counted, or on a pipeline that measures several things per image, the first of them, such as Area covered.
Under the curve, a row of small pictures shows your image with each value's overlay on it, so you can see what a value does rather than read a number for it: at the low end almost everything is marked, at the high end almost nothing. The stretch where the number stops moving is colored, and a value in the middle of it still holds next week, when the exposure has drifted.
On a setting left on Auto, the row runs that value too and marks its picture Auto, with a pin on the curve above it, so you can see what the pipeline is doing right now among the values tried.
| Button | What pressing it does |
|---|---|
| Keep Auto, flag images outside 116–209 | Records the stretch as the expected range, and leaves Auto choosing for each image |
| Switch to Auto, flag images outside 116–209 | Does that, and releases a value you had fixed |
| Set Threshold to 116 | Fixes the setting at one value |
| Set the cutoff to 40 | Moves a filter |
Point at a picture and the image above shows that value's overlay, so you can run along the row and watch the marks move on your own cells. Click one to choose it, or move the pick with the arrow keys. The image keeps showing what you chose once the pointer leaves.
On a phone, opening Try a range from the settings sidebar closes the sidebar, the image gets shorter so the panel fits under it, and the pictures scroll sideways, and tapping one shows it on the image. Using one closes the curve so you can see the setting on the image. Nothing changes until you press one of those buttons, so you can read the curve and close it.
Trying a range on a cutoff counts the objects the run already found, so it takes no time and uses nothing.
Trying a range on a setting that changes what is detected runs the pipeline again for every value, on the image in front of you. On a pipeline that detects with an AI model each of those runs would detect again and use that much usage, so Try a range stays off beside those settings, and hovering it points you at the cutoff under the image, which answers the same question for nothing.
The key under the image says what the overlay's colors mean for the step you have open, and on a measure step you hover a region to read its values. On a z-stack, the plane row steps aside while Try a range is open, since the range is being tried on the plane already in front of you.
Filtering What Counts
Under the image, Filter in the step's card trims what counts by Size and Brightness. A detection made by an AI model offers Confidence too, since the model scores each object it finds, and a run that sorted objects into two or more color groups offers Color. Filtering happens on results you already have, so narrowing a size range uses nothing and takes effect immediately.
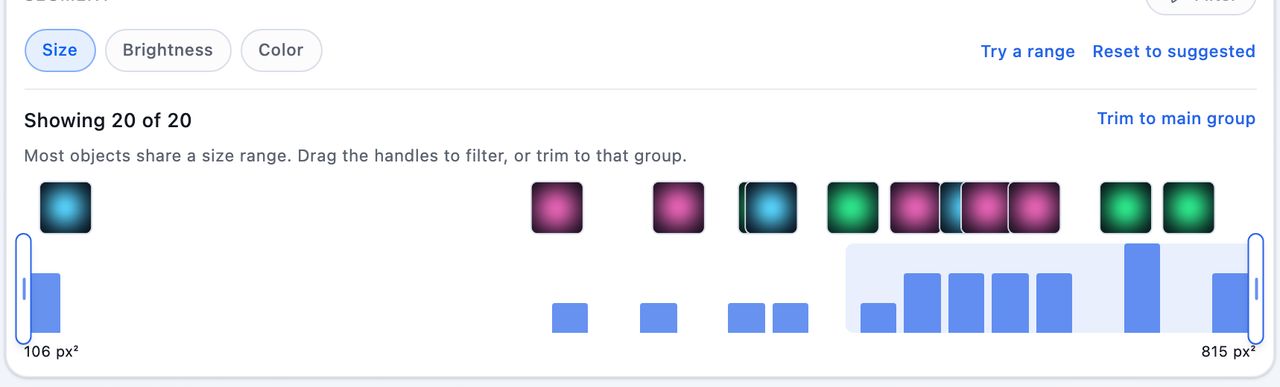
Where the run measured it, Size offers px² or µm² and Brightness offers Raw or Above background. The second reading of each carries between experiments: µm² describes the same object at any magnification, and above background measures each object against the background of its own image, so a cutoff still holds when the exposure changes.
Measuring in µm² needs the image's scale set, and on a set where only some images have one, the images without it report a check saying so. Picking a unit clears that range, because the same number means something else in the other one.
On an image set it moves every image's saved count with it, counted again from the objects the run stored, so no run joins the history and nothing is spent, even where the pipeline detects with an AI model.
On a set, a range covers every image until you say otherwise. Filter this image separately narrows it to the image in front of you, the panel then reads Filtering this image only., and Use the shared range puts it back on the set. Size says the same thing as Apply this size range to all images, and Color as These colors apply to all images. Reach for a separate range where one slide was stained or exposed differently, and keep the shared one everywhere else, so the set is measured one way.
Some results cannot be counted again that way, such as a pipeline that counts objects inside a container, one that measures the whole image, or a run made before Conspecta started storing every object it found. The card with Filter says which, in a line opening "The saved results still use the earlier filters", and Run on all N images beside it brings the table up to date.
Three controls put filters back:
- Show all in a panel clears that one filter.
- Reset to suggested, at the end of the row of filters, sets Size to the cutoff that hides specks far smaller than your main group of objects, when the image has them, and clears the other filters.
- Undo in the message that follows puts your earlier filters back.
Ground Truth
Ground truth measures the pipeline against your own eyes. Count the objects on an image yourself with the counter in the viewer, then Use marks as ground truth on the annotation toolbar keeps those marks against the image.
Every run over it then reports how many of them it found and how many it found that you did not mark, beside the run's own number and again in Accept run. Marks belong to the image rather than to one analysis, so a second analysis over the same image is measured against the same twenty cells, and they stay after the analysis that drew them is gone.
A run that disagrees badly with your marks is named in Checks. Agreement close to your marking is left alone, because a pipeline that finds nineteen of your twenty is arguing with your hand rather than with the cells.
Best match to marks appears beside Try a range on an image you have marked. It picks the value that agrees with your marks most closely, where Try a range looks for the stretch where a number stops moving. Reach for it on an image you have marked, and for Try a range everywhere else.
Checks
Each step reports its own Checks, which flag a step that found nothing or suspiciously many things, so you can catch the mistake before you run it across 200 images.
Checks also lists any image in the set whose automatic setting landed outside the range its step expects, naming the image and the value it reached, and that image's card in the run review carries a check of its own. A check is a note, a warning or an error, so open any result with a count beside it. The panel appears only when a step reports a check.
A control image that missed its range is listed here too, at the severity that control was set to, which is flag as on its row in Controls.
Running the Set
The steps end in a Preview card, which suggests trying your settings on one image first and running them on the rest once it looks right. Run works through the image in front of you, and Run on all N images below it runs the whole set.
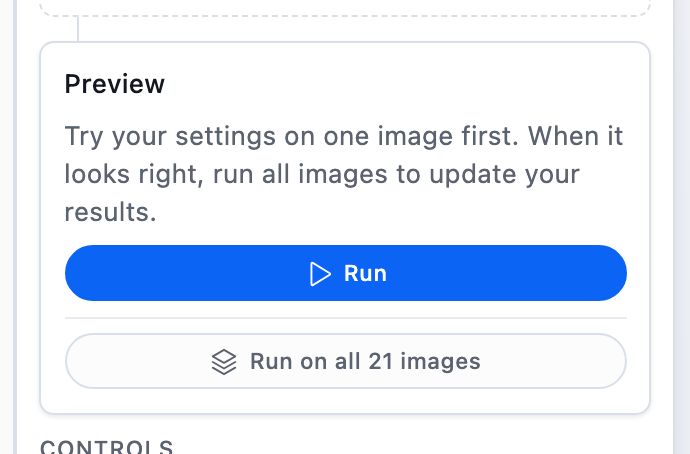
On a brightness-cutoff pipeline the image also follows your settings as you type, and once those exact settings have run on it Run switches off with the line "These settings have already run on this image. Change a setting to run them again." On an image set the line reads "Run them on the whole set below" instead, because running the set is what saves numbers at new settings.
A detector backed by an AI model waits for Run, except in an image analysis started from Plate Count on a phone, where the photo on screen starts as soon as it finishes uploading.
On a phone the same run is also at the end of the row of images under the photo: Run works through the image in front of you and shows how long it has taken, and once that image has a result the button reads Run on all N. For an AI detector it first opens a card with the same usage line and meter as the sidebar. If a run fails, or the pipeline can't run on the image, the reason shows above that row.
Changing a detection setting changes only what's on screen. The results table keeps the numbers from the last run over the set until you run the set again, so you can work through a dozen cutoffs on one image with the rest of your results untouched. Moving a filter is the exception, because it re-counts objects the run already found rather than finding them again.
A run over one image while the rest of the set has no numbers is a trial, so it stays off Analysis run and your first Run on all N images is run 1. Close the image analysis after a trial and that run is kept, because its numbers are the ones the results table holds.
When the preview is right, Run on all N images repeats the same pipeline across the set. For a detector backed by an AI model, the card under the button says how many images still need detecting and how much of the month's usage is left, and a team with no usage left sees that before it starts the run.
A pipeline with an AI detector runs on Conspecta's servers, so you can close the tab. Stop ends it after the image in hand and keeps every image it finished, and a run that finishes appears in your inbox under Image Analysis Runs.
Every other pipeline runs in this browser tab, as does a set the servers can't take (more than 50 images or slices, images inside a multi-image file such as a LIF, or an image set whose detection step reads all channels together), so keep the tab open while those work. Notify me when done raises a browser notification when a run lands.
Once the set has run, Run on all N images switches off until you change a setting or add an image. Removing an image that has results asks you to confirm, then deletes its results from the results table. Every other image keeps the results it has. On a pipeline with nothing to adjust, the line under the button reads "These settings have already run on every image. Add an image to run them again."
Once a pipeline finds what you meant, Image Analysis Templates keeps those steps and settings under a name, so next week's plate is measured the same way.
Z-Stacks
A z-stack uses as much as its number of slices, so Conspecta checks which slices are in focus and offers to run only those. Depth, under the image, shows what it found, such as Slices 5–17 in focus · 13 of 40 will run, and you can accept it, widen it, use every slice, or reset to the suggestion.
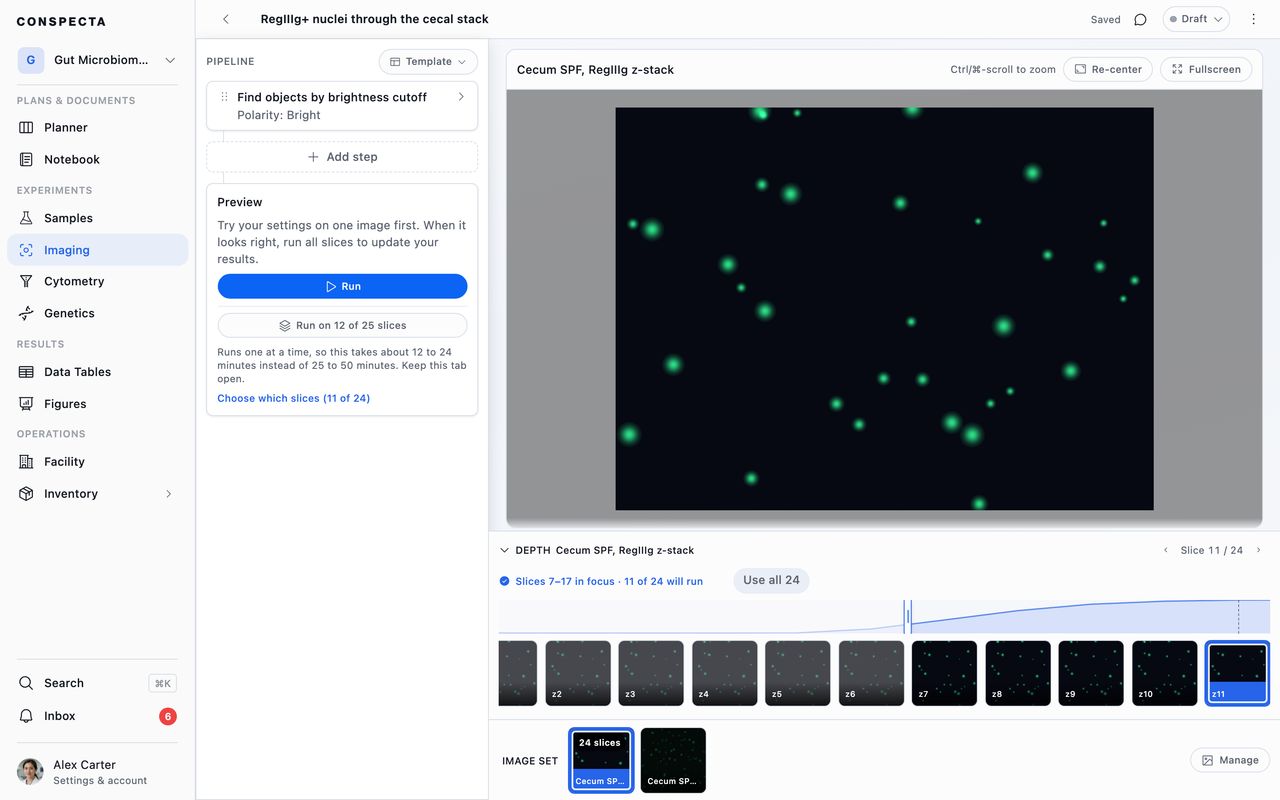
Depth says one of six other things when the stack is not a single clean band, and the run follows whatever it says:
| What Depth says | What it found, and what runs |
|---|---|
| 2 regions in focus | Two stretches in focus with the blurriest slices of the stack between them, which are skipped. Both regions run unless you narrow it, and Depth offers Both regions beside a button per region, so a stack holding two specimens at different depths can run one of them on its own |
| Every slice looks usable | A stack thin enough that nothing is out of focus, so every slice runs |
| No clear focus | A stack that reads as uniformly dark, so there is no band to suggest and every slice runs |
| Focus check failed | The check could not score this stack. Every slice runs, and reopening the image analysis tries it again |
| your range | A band you set by hand, as in Slices 6–20 · your range · 15 of 40 will run. The suggestion stays one click away |
| Checking focus… | The check is still scoring the stack |
Across a whole set, Choose which slices lets you decide once: detect focus per stack, or apply one range everywhere. Each stack in that dialog box carries a tag for what it came to, one of auto, nothing to trim, shallower, not checked, or a count such as 2 regions, so you can read what every stack came to before running any of them. The focus check itself runs on your own machine and uses nothing.
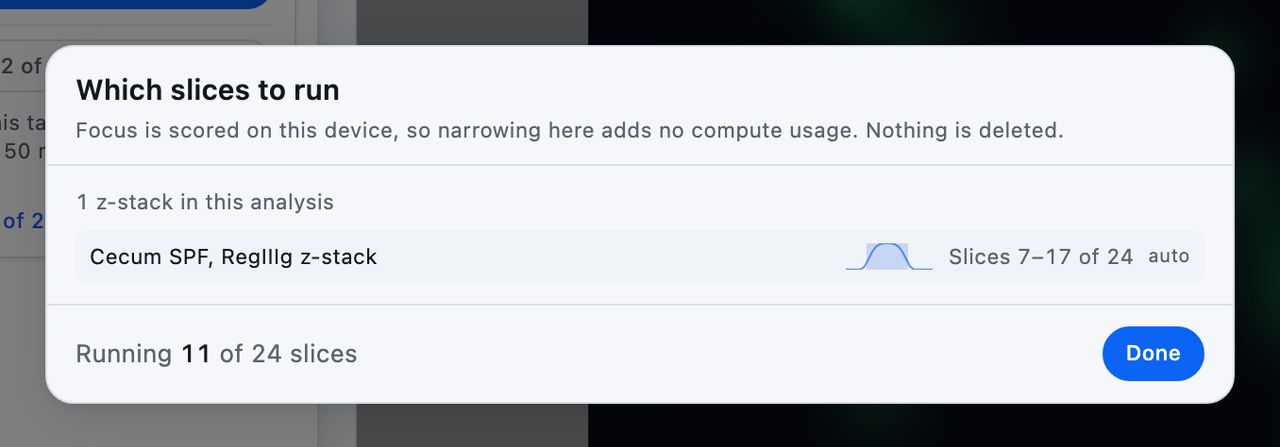
Once any image in the set is a stack, the run counts slices rather than images, so Run on all N images reads Run on 13 of 40 slices with the trim already in the number.
Watching a Run
A run across the set takes over the middle of the workspace once it has been working for a second, and a run that finishes sooner opens straight onto its results. Running the set counts the images analyzed against the total with the time so far, and the most recently finished image sits below it at full size with its detections drawn on top. From the second image on, you can see whether the detection is landing on your cells.
Analyzed so far is the row of everything the run has finished. Click a tile to hold that image and study it while the run carries on behind you, and Jump to latest puts you back on the newest one.
Stop ends the run and keeps every image already analyzed, with its numbers. The results header then reads Stopped after 7 of 40 images, so the record shows how much of the set the numbers cover.