Image Analysis Templates
A template is a tuned pipeline kept under a name, with its own versions and its own sign-off, so a lab can agree on one way of measuring and reach for it again.
Saving a Template
Once you have tuned an image analysis until it finds what you meant, Save as template, in the Template menu on the Pipeline heading, keeps that way of measuring under a name, so next week's plate is measured the same way. It works once a run has produced results.
Give it a name, and a description saying when to reach for it and on what kind of image. The dialog box tells you how many steps it is keeping.
The Template Library
Templates in the Analysis tab's header opens the library, and so does Browse templates in the Template menu of an open image analysis. Applying a template from inside an image analysis opens the new one with a back button to the analysis you were in. Search the library by name, description, or who saved it. Each row carries the number of steps it holds, how many results were built from it, and who saved it.
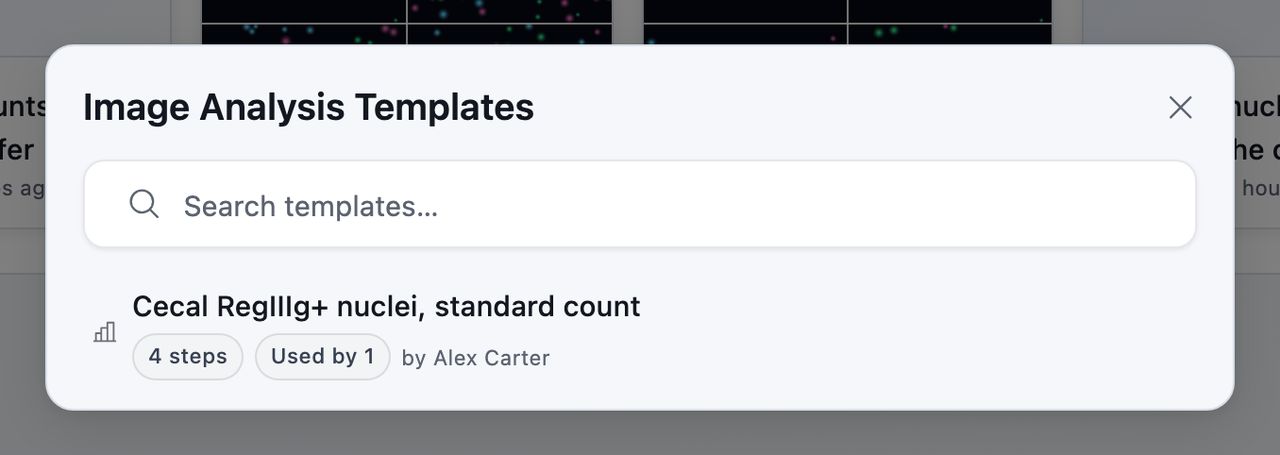
Opening a template shows what it holds and what has come of it, across three tabs:
- Details lists its Steps in the order they run, its Controls, and its Versions, with Apply template at the foot.
- Connections maps what the template is connected to. Every image analysis built from it appears here, and clicking through to one opens it.
- Activity holds comments and sign-off alongside the template's own history, so a lab can agree on a standard way of measuring there. A template someone approved says so on its row back in the library.
Under that map, the same results are listed with the template version each was built on, so one made from an older version is marked Built from an earlier version. Its numbers stay as the steps that ran at the time computed them, and you decide whether to run the newer version. From any item on the map you can re-center on it and keep going, which is how you get from a template to the images an analysis read.
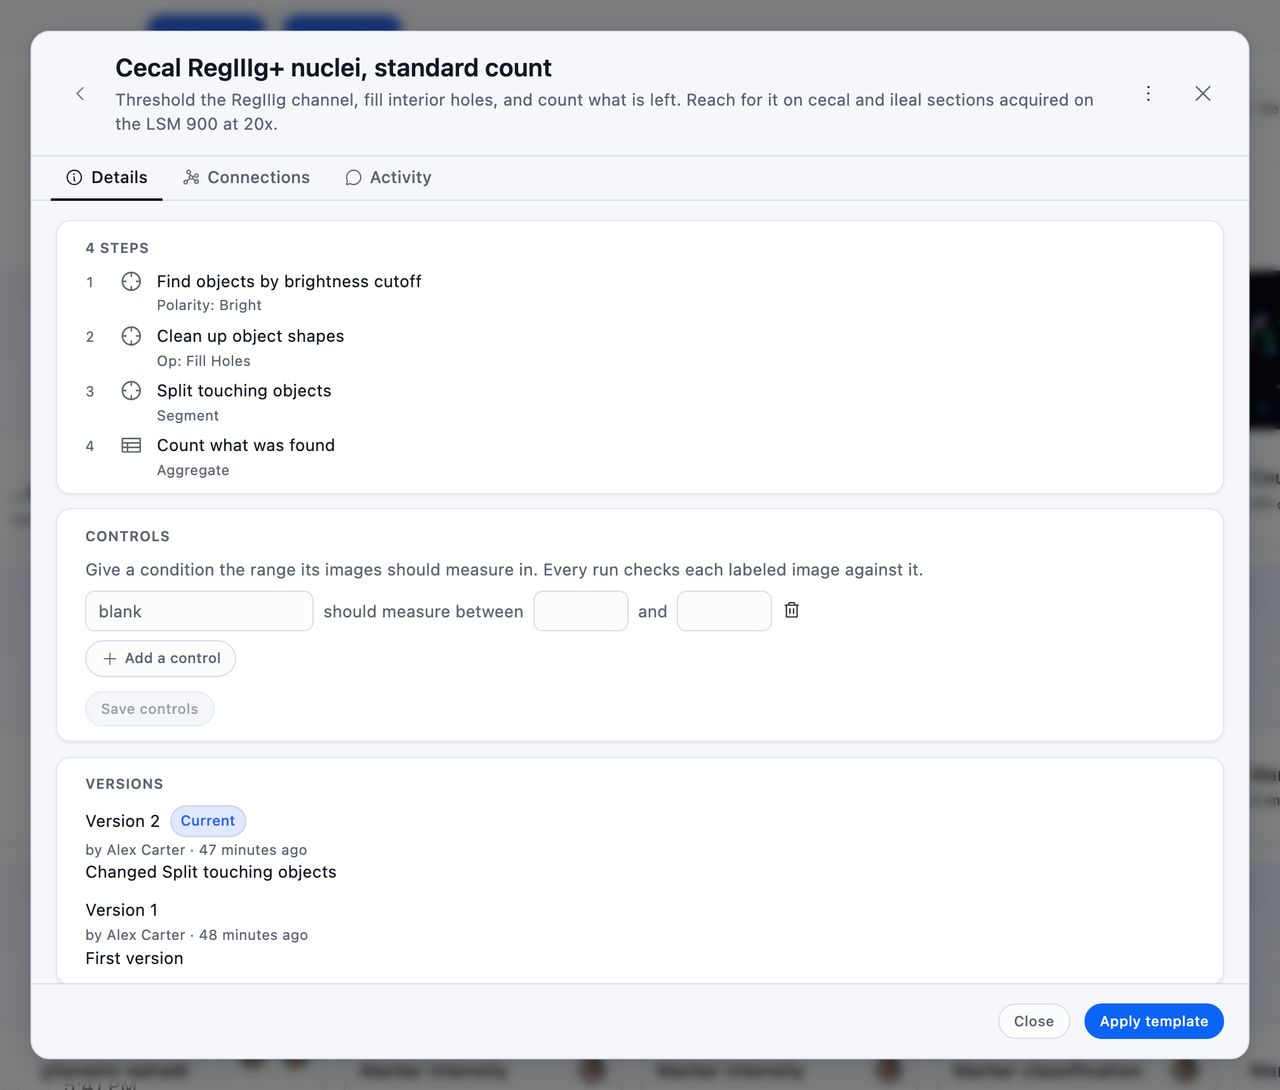
Versions
Versions lists every version the template has had, newest first, with who published each one and when. The newest is marked Current.
Each version names the settings it changed from the one before, such as Smallest object or Channels, and version 1 reads First version. A version that added or removed a step reads Steps, and a template whose steps no analysis type builds lists its versions without that line. Renaming a template or editing its description adds no version.
An image analysis started from a template also has Update template in the Template menu. It opens a dialog box naming the version your settings would become, with What changes listing the settings that differ from the template, Steps among them when you added or removed one.
Update template in the dialog box publishes them as that version, and marks this image analysis as built from it. Everything built from earlier versions keeps the settings and results it has. When your settings already match the template, the dialog box says so and offers only Close.
Applying a Template
Apply template takes you to the images. Name the result, set whether it is Shared or Private, pick the collections or individual images to run it over, and Start analysis opens a new image analysis with the template's steps and settings already in place.
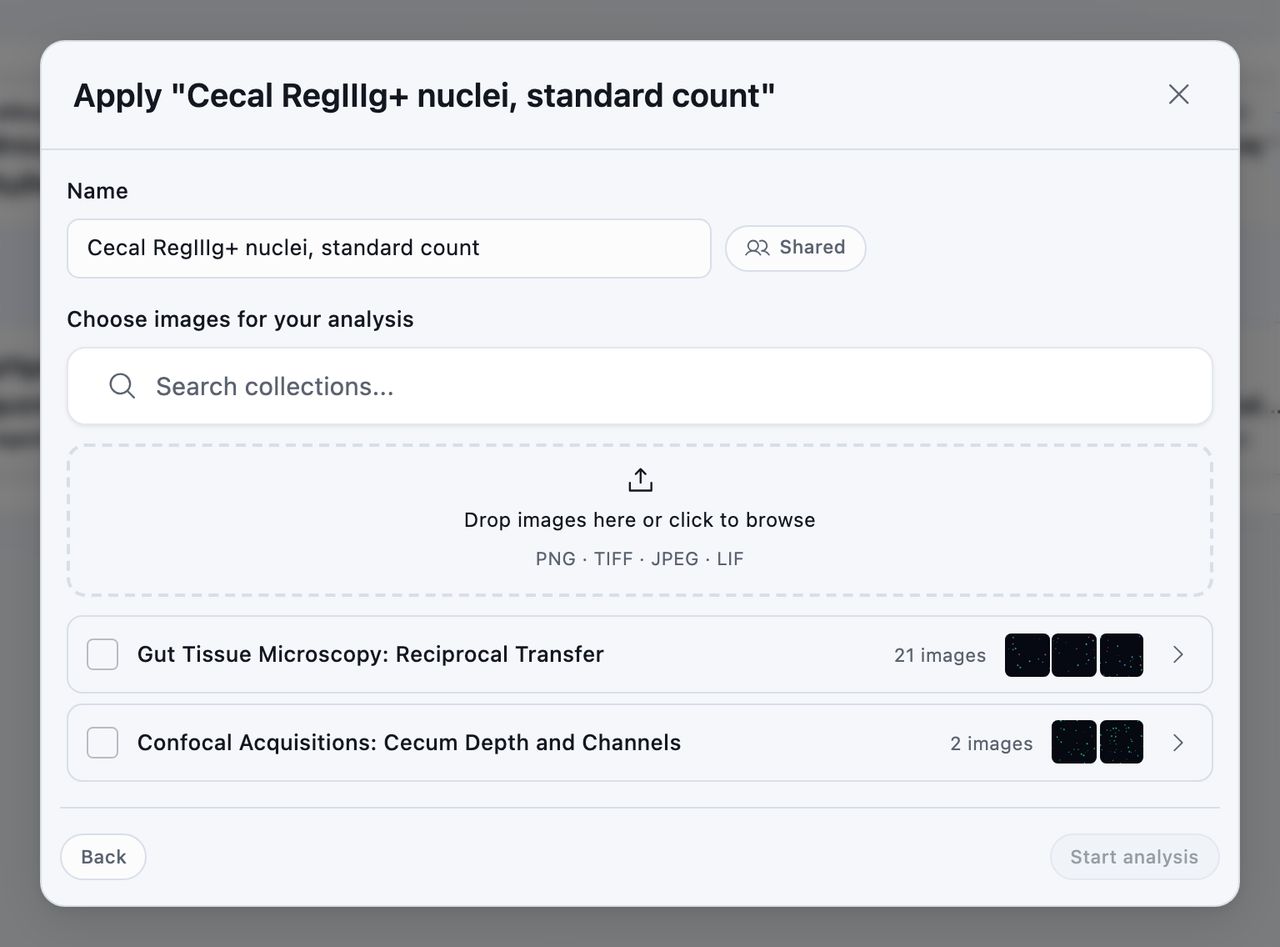
Once you have picked, the dialog box reports how many of those images the template runs on, and names each one it cannot with what that image is missing. A flattened JPEG has no separate channels to give a template that reads two, and a LIF can carry fewer channels than the template reads.
A template that filters objects by their size in µm² needs each image's scale, so an image without one is named as well. Set its scale and the template runs on it. You can still run a template over a mixed set, and the images it skips are named before it starts. The new image analysis can be tuned further from there, and it records which template and which version it came from.
Controls
A control check records what a control image should measure. A template carries it in the Controls block. An image analysis carries it as a step, added from Add step under Aggregate as Check controls, sitting last in the pipeline because it judges what the other steps produced. Open the step to reach its ranges.
Each row reads as a sentence. Pick a condition your images carry, such as blank, choose how the range is bounded, and give the number or numbers it takes.
| Bound | Numbers it takes | Reads as |
|---|---|---|
| between | Two | 0 to 3, both ends included |
| at least | One | 500 or more |
| more than | One | Above 500 |
| at most | One | 3 or less |
| less than | One | Below 3 |
A positive control that should clear 500 with no ceiling is written at least 500, so a plate that measures 4000 passes.
A pipeline that measures several things per image is checked on the first of them, so an area coverage control is a range of Area covered written as a fraction, such as 0 to 0.05 for up to 5%.
Where the run on screen already covered that condition, the row carries a button offering the lowest and highest its images measured, which fills the boxes when you press it. Those numbers come from this run, so read them before you take them.
flag as at the end of the row sets how loudly a miss reports: Note, Warning or Error. A control never changes a number and never stops a run, so the severity decides how hard the miss is to walk past.
Every run that covers one of those images checks it, and a blank well that counts 40 is named in Checks with the number it reached, carries a check on its card in the run review, and shows in Accept run above the choices, so you read the verdict before your name goes on the run. The run keeps the numbers it measured either way, because a control that came out wrong is a result worth seeing rather than one to hide.
Open the step against a finished run and it lists that run's control images below the ranges, one row each with the image, its condition, what it measured, what was expected, and whether it passed.
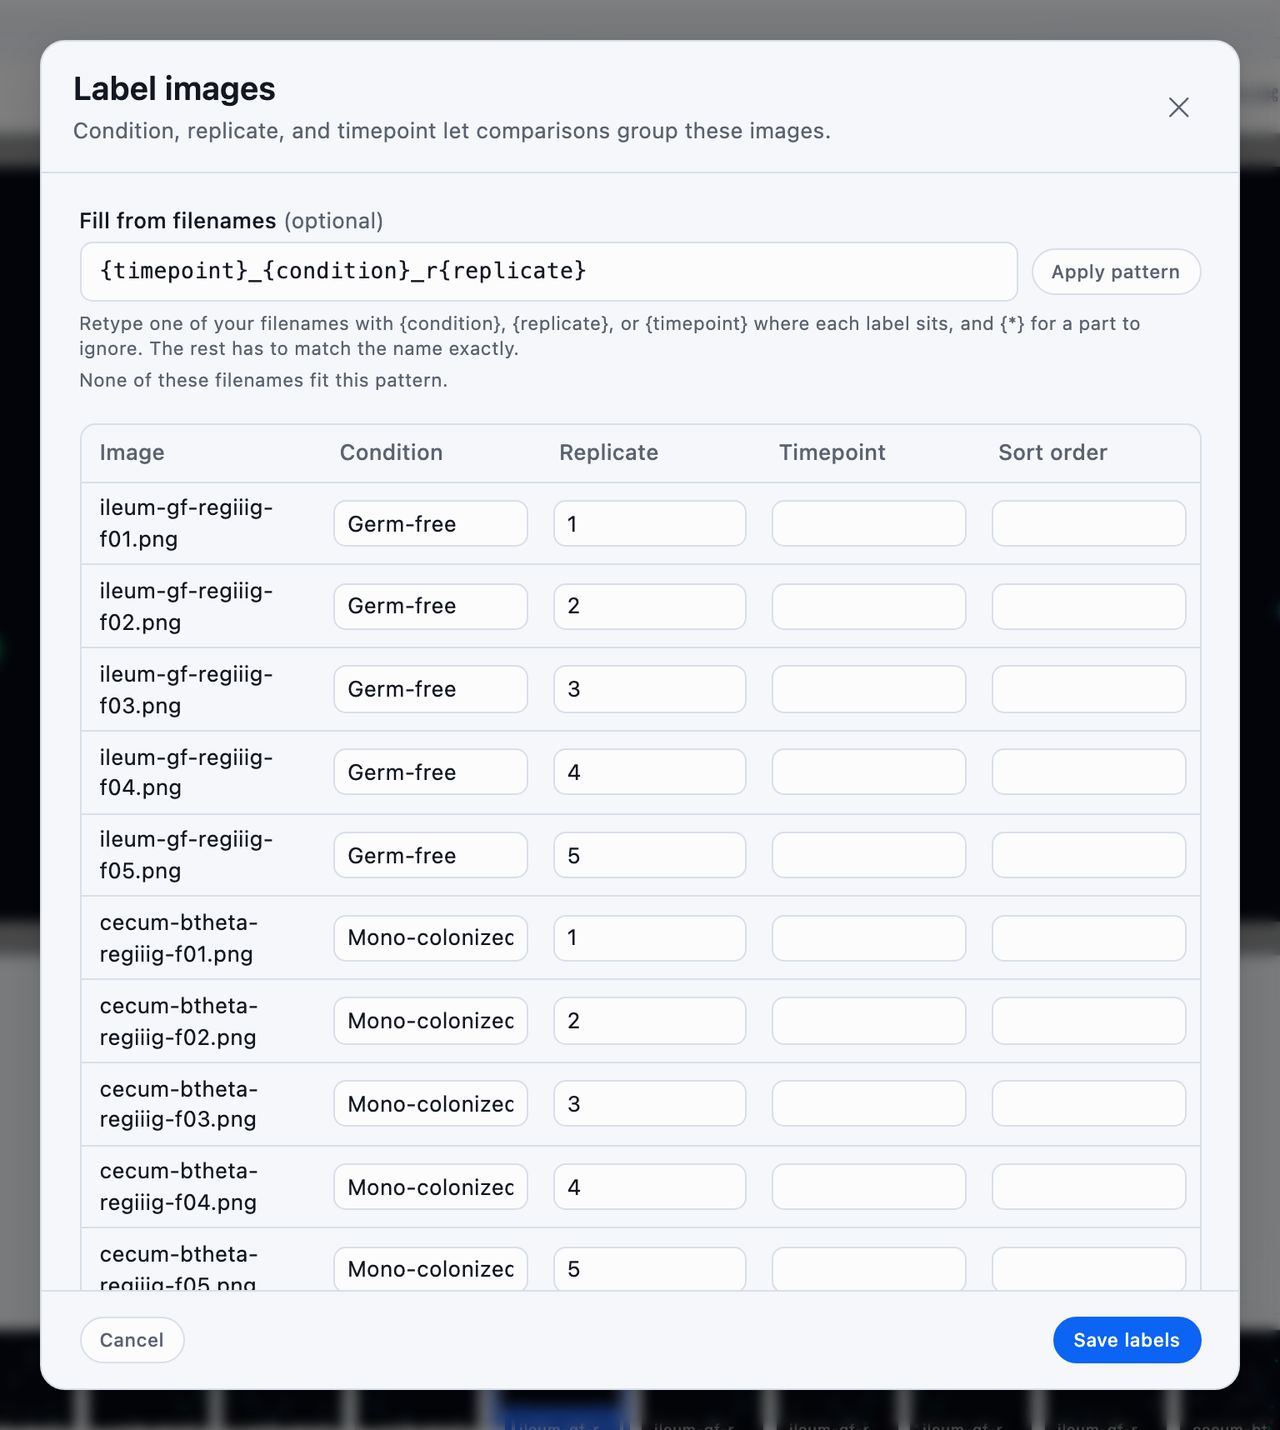
A control keys on the condition label its images carry, so label them first. Label images opens the grid the comparison uses, covering that analysis's own images, from the ⋯ menu at the top of an analysis and from the control step itself. Each condition the step offers says how many images carry it, so a label you do not recognize is one you can count before you write a range for it. An image inside a multi-image file, such as a series in a LIF, is addressed by its file and series rather than by a record of its own, so it can carry no label. An analysis whose images are all series therefore has no Label images on that menu, and nothing for a control to key on.
Sharing and Deleting
Templates are shared with everyone on the project. Anyone on the project can open the library, read a template and its versions, and join the discussion. Saving, updating, renaming, applying, and deleting stay with members who can edit.
Delete moves a template to the trash with its versions, where it can be restored for 30 days. Everything built from it keeps the steps it ran and the results they produced.
Tip: Ask your AI assistant for a project's templates and it can run one for you on a set of images, then show you the numbers before anything is saved. It reads the same settings and versions as the library, so it can tell you what changed between two versions, and when you ask it can save an image analysis as a template or publish its settings as the next version. See Connect Your AI Assistant.