Write Notes and Protocols
The Notebook holds two kinds of page. A note records what you did, what you saw, and what it means. A protocol holds numbered steps with materials, timers, and instruments, written once and run at the bench as many times as you like. Sharing a page, getting it signed off, publishing versions, and exporting are covered in Review, Version, and Share Notes.
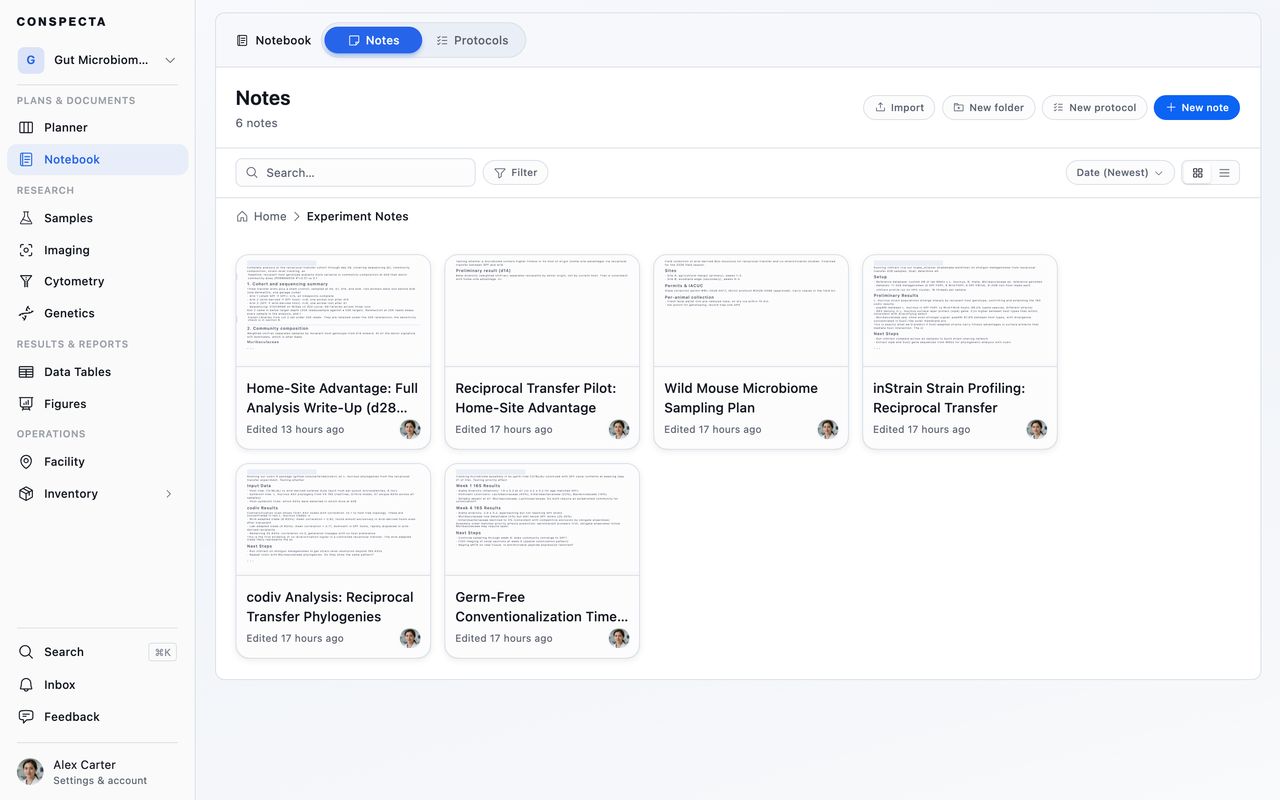
Notes and Protocols
The workspace opens on two tabs, Notes and Protocols, and the header offers Export, New folder, New note, and New protocol.
Folders hold both kinds, so a folder built around an experiment keeps its protocol next to its results. A folder shows on a tab only when something inside it belongs there, so a folder of meeting notes stays off the Protocols tab.
Folder and Page Menus
Every folder and every page in the list has a ⋯ menu:
| Item | On a page | On a folder |
|---|---|---|
| Rename, Move to..., Star | Acts on the page | Acts on the folder |
| Download | Opens the export dialog on the page | Opens the export dialog on the folder and everything filed in it |
| Share or Make private | Changes who can see the page. Only its creator sees this | Changes every page inside. Missing when the folder holds someone else's page |
| Duplicate note or Duplicate protocol | Makes a copy and opens it | |
| Delete | Deletes the page | Deletes the folder and everything filed inside it |
Switching Between Note and Protocol
Convert to protocol or Convert to note sits in the menu on the page's card and in the menu at the top of the open page. The page keeps its comments and sign-offs.
- Note to protocol rewrites the note's numbered list as steps, one per item, so Conspecta asks you to confirm first. Anything above the list moves to Before you start.
- Protocol to note turns the steps into a plain numbered list.
- A protocol that has been run can't become a note, because its run history hangs off it. Conspecta offers to copy the procedure into a new note instead.
Finding a Page
View on the toolbar sorts by date, name, or review, and filters by when a page was modified, who owns it, or where its review stands. Sorting by Review puts the pages someone is waiting on first, then Changes requested, Approved, and Rejected. Spotting a reviewed page explains each status. The box in the toolbar filters the list by title, and Cmd/Ctrl + K searches the whole project.
Field under View finds the pages whose answer field, linked to a data dictionary field, holds one answer. Pick the field, then the answer, such as Outcome and Failed, and the list keeps the pages that match, ignoring capitals and surrounding spaces. Leave the answer empty to find the fields nobody has answered yet.
Importing
Import files in the New note and New protocol pickers takes Word, PDF, and Markdown documents. Each file becomes its own page. Fill-in boxes in a Word form come in as answer fields, so a form your lab already uses can become a template.
You can also import with Import under the header's ⋯, which lands pages as whichever tab you're on, or drag a batch of files onto the list, which asks which kind and lands them in the folder you're looking at.
The Editor
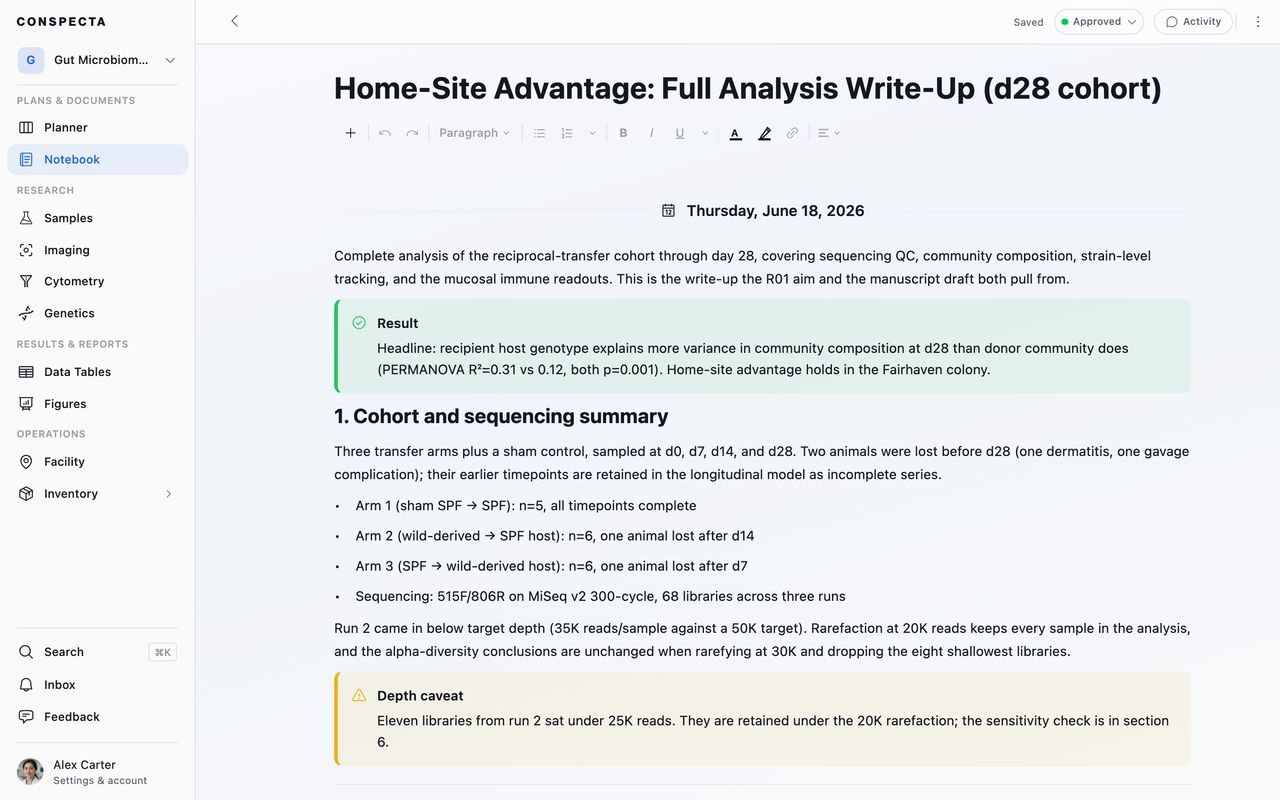
Type into the page and it saves as you go.
| Keys | What they do |
|---|---|
Enter | Starts the next block, or the next item in a list |
Shift + Enter | Adds a second line inside the same block |
1. , - , # , > at the start of a line | Turns the line into a numbered item, a bullet, a heading, or a quote |
/ on an empty line | Opens the quick insert menu |
`code` | Turns the word into inline code as the second backtick lands |
Cmd/Ctrl + K with text selected | Adds a link |
Cmd/Ctrl + F | Opens find and replace |
Formatting covers bold, italic, underline, strikethrough, highlight, subscript, superscript, inline code, four heading levels, alignment, indenting with Tab, and text and highlight colors. Find in page in the page menu opens the same find bar, and on a note you can only read it finds without replacing.
Inserting a Block
Press / on an empty line and type to filter, such as h2 for Heading 2 or plot for Chart. The + buttons, in the toolbar and beside the line you're on, open the full Insert view, which describes every block. Both offer the same blocks:
| Group | What's in it |
|---|---|
| Text | Text, Heading 1, Heading 2, Heading 3, Heading 4 |
| Common | Table, Side by side, Chart, Quote, Code, Checklist, Answer field, Progress bar, Bullet list, Numbered list, Divider |
| Images | Upload image, Image from sample, Image from gallery |
| Links & references | A note, protocol, protocol run, task, order, supplier, sample, plate, sequence, data table, panel, flow dataset, image collection, or website |
| More | Info, Warning, Success, and Error callouts, Date, Table of contents, Emoji, Special character |
The Block Menu
The grip beside every block opens its menu:
| Item | What it does |
|---|---|
| Turn into | Switches a line, or every selected line, to Text, a heading, Bullet list, Numbered list, Checklist or Quote, keeping what you wrote |
| Comment | Opens Activity with a comment on the block |
| Add block above, Add block below | Starts an empty line there |
| Duplicate | Puts a copy of the block under it |
| Display as | On a linked record, sets its size |
| Move to…, Copy to… | Sends the block into another note or a Planner task, creating it if it doesn't exist yet |
| Delete | Removes the block, or every selected block |
Linking Records
The pickers under Links & references list what's in the project. Most also make a new record without leaving the page:
| Picker row | Asks for | Creates |
|---|---|---|
| New data table | A name | An empty table in Data Tables |
| New sample | A type and a name | A sample in Samples |
| New task | A title | A task on this project's Planner |
| New plate | A name, a size, and optionally a saved layout | A plate, opened in the plate workspace |
| New order | What to order and how many | A request in Orders |
| New supplier | A name | A supplier for your lab |
| New sequence | A name, a type, and the bases | A sequence in Genetics |
| New note, New protocol | A title | A page beside this one |
A record made from a private page starts private. A table, sample, or sequence made from a page names that page as where it was created.
Display Sizes
A linked record shows at one of three sizes, set from Display as in its grip menu. The size is saved with the page and leaves a sign-off in place.
| Size | Shows |
|---|---|
| Chip | One line with the name and a status dot |
| Card | A line of facts and the status. Tasks, orders, runs, and suppliers add a second line, such as due date and assignee |
| Preview | The record itself: a collection's first photos, a sequence's map, a protocol's steps, a table's rows, a plate's map, a panel's markers and dyes |
Collections, flow datasets, data tables, panels, samples, and plates arrive as previews, and everything else as a card. Click a record at any size to open it, or ⌘-click (Ctrl-click on Windows) to open it in a new tab.
A protocol's preview lists every step in order with its duration, the steps of any section it includes among them, and names the case under each step of a branch. Its step count and total time include the sections' steps. An exported page lists the same steps with the same numbers, from the version the card runs.
A protocol longer than eight steps shows its first five and Show all under them, with Show fewer to close it again. Whether it is open is saved with the page, like the size, and leaves a sign-off in place.
A card can also read:
- This image collection was deleted, dashed and gray, with Remove
- You don't have access to this sample, naming nothing about it
- Couldn't load this sample, with Retry
Acting on a Record From Its Card
On a page you can edit, some cards act on their record directly:
- Click a task's status to move it to another column, or an order's to mark it processing, complete, or incomplete.
- A running run's card shows its next step with Mark done.
- A protocol's card on a note is one stage of an experiment. It carries Start run and Schedule, says whether that stage is not started, scheduled, running or completed, and once a run finishes offers to add the run's result tables. Running an Experiment in Stages covers the card in full.
Linking Out and Linking In
Select text and press Cmd/Ctrl + K, or use the link button, to link it. A URL pasted over a selection links it, and a URL typed on its own becomes clickable.
Pasting an outside URL with nothing selected asks Embed a URL?. Yes turns it into a website card, and Keep as text leaves the address. The link dialog's Turn into embed does the same later.
Pasting a link to a Conspecta record asks, for example, Insert sample HEK293-p12?, and Yes drops in its card. This works for notes, protocols, runs, tasks, orders, suppliers, samples, sequences, data tables, flow datasets, and image collections in the same project. Anything else, such as a figure or a record in another project, stays as plain text.
Tables
A page takes two kinds of table.
| Table | Linked data table | |
|---|---|---|
| Where the rows live | On the page | In Data Tables, and every page showing it stays current |
| Settings (the gear at the top right) | Table style: Grid, Lines, Outline, or None rules, header row or column, banded rows, spacing, and adding rows and columns | Which columns and rows the page shows, and Add rows from a file |
| Editing | Type in it like any text | Click a cell and type. Every column must be showing |
| Charting | Turn it into a data table first | Any chart Data Tables offers |
A text table shows its gear when you point at the table. A linked data table keeps its gear at the right end of its header row.
Turn into data table, at the foot of a table's Table style panel, moves its rows into Data Tables. The header row names the columns, numbers become numbers, and bold, colors, and alignment stay behind. Undo brings the text table back.
A table an analysis produced, and a panel or assay table, are edited from their own workspace, and the page says so above the rows.
Lists, Checklists, and Columns
- Numbered list keeps counting through paragraphs between items. A heading, a divider, or a blank line starts again at 1. Type
6.to start at 6. - Progress bar counts the checklist directly above it, so two checklists on one page each get their own bar.
- Side by side puts two columns next to each other, such as a gel photo beside its interpretation. Hover it for Hide divider or Remove split. On a phone, and in Markdown exports, the columns stack.
- Table of contents builds a linked outline from the page's headings. A page takes one.
- Code blocks show a copy button when you point at them. Editors pick the language beside it.
Charting Your Data
Chart opens Insert chart, listing everything in the project you can chart: data tables, image analysis results, and gated flow cytometry data.
- A data table asks for a chart type, such as Bar, Scatter, Box plot, or Heatmap, and the columns for each axis and grouping.
- An image analysis asks which of its charts to draw.
- A flow analysis asks which view to draw, from the table below. It's listed once it has been gated.
| View | What it plots |
|---|---|
| Frequency (% of parent) | Each population as a share of the gate above it |
| Event count | How many events fell in each population |
| Population composition | Populations stacked as a share of the whole sample |
| Median intensity heatmap | Median signal for every marker across every population |
| Marker median by population | One marker's median signal across every population |
A chart redraws from its source every time the page opens, so editing a table's rows or re-gating in Cytometry moves the chart on your page.
Chart Titles and Settings
A data table's chart is titled from what it plots, such as Concentration by Sample, with the table's name on the line below. Click the table's name to open it, or click the title to rename the chart.
The gear on the chart opens Chart settings, with the same choices you inserted it with and a Title field, and Save redraws the chart where it is. Empty the Title field to go back to the title from its columns, which follows the table when a column is renamed.
Chart settings also sets how the chart reads:
- The statistic that combines replicate rows
- The axis labels
- The Y axis's scale and range
- Error bars
- The individual points behind each bar
Add to Figure takes the chart, with those settings, into a figure, where you set its colors, fonts, legend and significance brackets.
Images
Drag images onto the page, paste one, or use Upload image. Image from sample and Image from gallery pick from what's already in the project.
- Formats. PNG and JPEG go in as they are. A TIFF becomes a PNG of its first page, so keep the original in an image collection when a multi-page or 16-bit scan matters.
- Viewing. Click an image to open it full screen, then scroll or pinch to zoom and drag to move around.
- Cropping. The crop only sets which part shows, so Edit crop can change it later or reset it. Exports carry the cropped version, and Download offers either.
- The toolbar also holds alignment, markup, and download.
Writing a Protocol
A protocol page opens with a version badge, which opens its version history, and a summary of its total time, steps, materials, and result tables. Press Edit to change it and Done editing when you're finished, so the recipe stays stable while someone runs it.
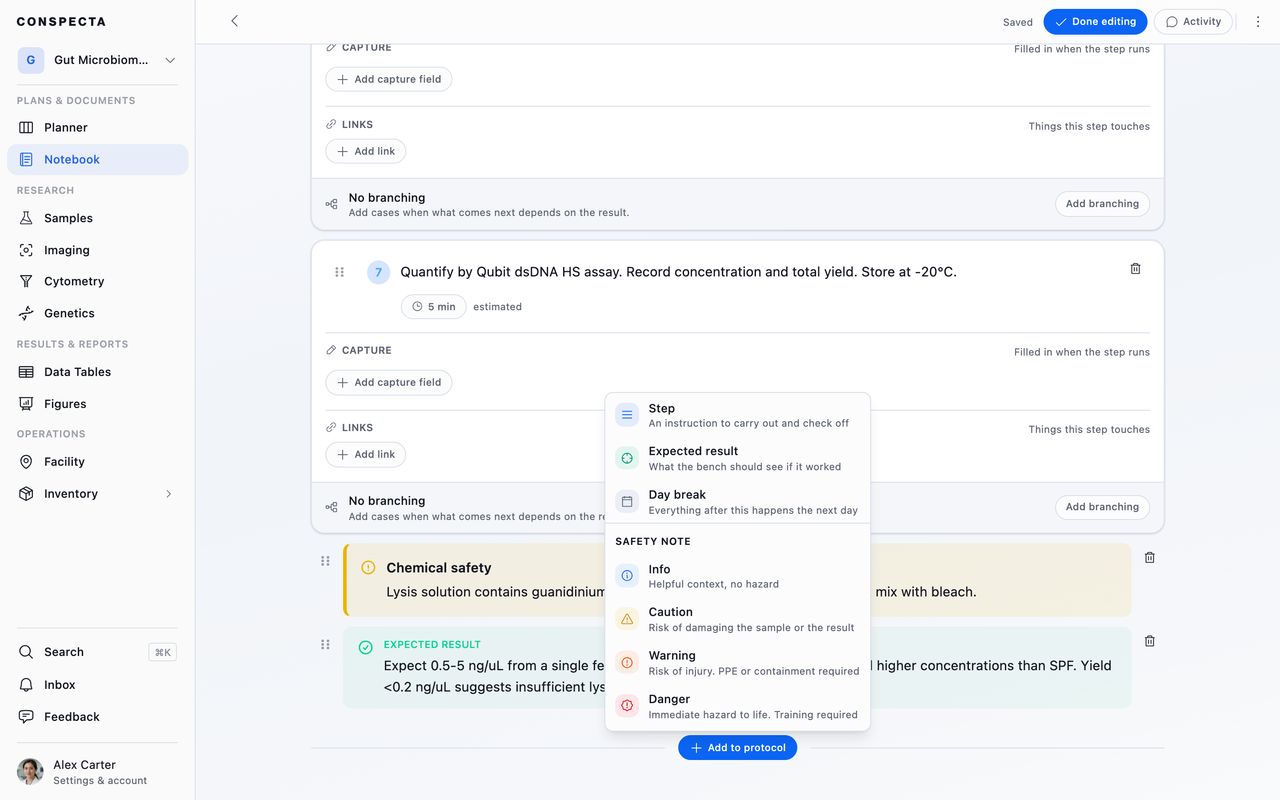
A protocol is built from its own blocks:
- Step, the numbered unit of work
- Safety note, at Info, Caution, Warning, or Danger
- Expected result, for what the bench should look like if it worked
- Day break, marking that everything after it happens the next day
- Protocol section, another protocol's published steps, such as a wash series you reuse. They number in line with the protocol's own, and an exported protocol lists them in their place
Each step can carry more:
| On a step | What it adds |
|---|---|
| Capture | Fields to fill in when the step runs, such as an OD reading or a lot number. Each field's name, type and Required sit on one line, with its unit and range, or its choices, beneath. Tick Required and a run can't be finished until the field is filled |
| Add result table | A table each run fills in, with named, typed columns and units. Add preset row holds rows that repeat every run, such as standards |
| Links | A Material from Inventory, an Instrument from Facility, or an Image analysis to launch. The instrument and the analysis each take a row under the materials, and clicking the instrument's name opens it in Facility |
| Add branching | Named cases, so "if the pellet is loose, do this instead" is part of the protocol |
Alt/Option with the arrow keys moves a step up or down. Deleting a step, a field on one, a safety note, an expected result, a branch case, a result table or a preset row asks first when it has anything written or set on it, and a blank one goes at once. Removing a section always asks, and the protocol it came from stays as it was. When the recipe is ready, Start run takes it to the bench, covered in Run a protocol.
The Data Dictionary
The Data dictionary holds the fields every project in your team records the same way, such as a concentration or a gel result. Each field has a name, a type of Number, Text or Choice, a unit and an Expected range (optional) for a number, the choices for a choice, and a description. A reading outside the range is flagged when it's recorded, and still saves.
Open it from any of these:
- Data dictionary in the ⋯ menu at the top of the Notebook, on both Notes and Protocols
- Data dictionary in the ⋯ menu at the top of Data Tables, where a column can use a field
- Manage the data dictionary, at the foot of a new capture field's list, while you edit a protocol
- Data dictionary in Settings, under your team
- Open data dictionary in search
The list on the left holds the team's fields, with archived ones under Archived and marked with an archive icon. The search box above it finds one by name, unit or choice, and its filter shows only live or only archived fields. New field, under the search box, starts another. A few rules keep recorded values meaning the same thing:
- The type is set when a field is created. To change it, archive the field and create a new one.
- A field with recorded values keeps its unit and the wording of its choices. You can still rename it, change its range and description, and add or remove choices. To reword a choice, add the new wording and remove the old one.
- Delete removes a field nothing has recorded yet, for good, after asking first. A field with recorded values offers Archive instead, and Restore brings an archived field back.
Someone in the project from outside the team sees the dictionary read-only, with a note saying why.
Using a Dictionary Field on a Step
While you edit a protocol, Add capture field adds a field with its name box ready and your team's fields listed beneath it. Pick one to link the field to it, or type a name to keep the field to this step.
A step's capture fields and a result table's columns are laid out as a table, one line per field, under the headings Field, Type, Settings, Required and Dictionary. A result table has no Required column. On a phone each field folds onto three short lines.
Settings holds what the field's type needs:
| Type | Settings |
|---|---|
| Number | Unit, Min and Max. A Min above its Max is marked, since a run would record every value as out of range |
| Text | Unit |
| Choice | The choices. Type each one and press Enter |
The name box of a capture field or a result table column reads Search or name a field. Type a few letters and pick one of your team's fields. The step takes its type, unit, range and choices and shows them as text, every choice included, and the Dictionary column shows Linked. Press Linked to see which dictionary field it is. Rename it on the step if your protocol calls it something else, such as "DNA conc." for Concentration, and it stays linked.
When what you typed matches no field in the dictionary, the list offers two more choices:
| Choice | What it does |
|---|---|
| New field | Opens a short form under the row. Create and use adds the field to your team's dictionary for every project and links the step to it |
| Use on this step only | Keeps the field on this step. Its type can be Number, Text or Choice, with a unit and range for a number. For a choice, type each choice and press Enter. Press the × on a choice to remove it, or Backspace in the empty box to bring the last one back to edit |
The Dictionary column shows what the dictionary has for each field. Press Changed, Team has this or Another lab to read what it means and act on it:
- Changed appears when the field changed in the dictionary after you picked it, and names its new unit and range or choices. Use new definition takes it. Until you press it, runs use the definition the step holds.
- Team has this appears on a field typed by hand when your dictionary has one of the same name and type. Use with your team's field, such as Use Ortiz Lab's Concentration, links it. The step keeps its own name for it.
- Another lab appears on a field copied from another lab's protocol. It offers your team's field of the same name and type when there is one, and Add to this team's data dictionary when there isn't.
- Save adds a field you typed on the step to the dictionary and links it, once the field has a name. Someone who can't change the dictionary sees This step only there instead.
New field, Add to this team's data dictionary and Save appear for team members who can change the dictionary. Anyone editing the protocol can pick a field.
Reusing a protocol as a section
Protocol section lists the project's protocols that have a published version. The section's steps number in line with the steps around it and stay on the version you picked. To change a section's steps, open its protocol from the section's name and publish a new version there.
When a newer version is published, the section names it, who published it and when, and offers three choices:
| Choice | What it does |
|---|---|
| See changes | Shows the author's release note and each step that changed |
| Compare side by side | Opens both versions next to each other |
| Use v1.1.0 | Moves the section onto it |
Templates
Save as template asks where it belongs:
- Private to me is yours in every project you work in.
- Shared with team reaches every project the team owns.
A name already used in that library asks whether to replace the template or rename yours, and replacing a shared one replaces it for everyone.
A note whose protocol cards run published versions keeps those versions as a template, so every note started from it runs the same stages, as Running an Experiment in Stages describes.
Pictures come with the template, up to 50, and count toward storage. Saving a template with pictures needs a team.
A template asks its questions with Answer field blocks, a label with a line of help and room for the answer. Add one from the / menu, or turn the current line into one from the toolbar's block type menu. Every note started from the template opens with the same fields.
Use a field from the data dictionary, under an answer field's help, links the field to one of the team's data dictionary fields. Linked to a choice field, it is answered from a list of the choices, and an answer outside the list stays as written and reads Not one of the choices. A number outside its field's range is marked the same way. Notes started from the template keep the link, so the Field filter finds every one of them. Unlink removes the link and keeps the answer.
The button appears on a field with no label yet, and on any field once you edit its label or help, so someone filling in a note started from the template sees only the questions.
You can keep 200 templates of your own and 500 in a team's shared library, counting notes, protocols, and data tables together.
Starter Templates
Conspecta comes with starters too. The protocol starters cover western blot transfer, PCR amplification, bacterial transformation, cell passaging, plasmid miniprep, Gram staining, DNA extraction, qPCR plate setup, and a sandwich ELISA. Each records its results on the step that measures them, as capture fields or a result table every run creates, such as PCR's gel table of lane, sample, band size and pass or fail.
The qPCR and ELISA tables have the columns their assays under Analyze ask for, and the ELISA table starts with its standards in their wells, in duplicate down columns 1 and 2, so Fill readings from a file puts the plate reader's export straight onto it.
Each protocol starter has a write-up note starter named after it, such as PCR Amplification Write-Up. It asks for the question, the design, the result and what it does and doesn't show in answer fields. When the project has a protocol with that starter's title, the note opens with that protocol's card, ready for Start run.